I just came across this beautiful blog full of DIY projects, fashion tutorial photography, beauty and decor ideas. You're going to love this blog as much as I do. It's called A Beautiful Mess Blog. I came across this site, from Pinterest. Have you ever gone to that site yet?... it's full of inspiring images more than you could ever imagine. If you need an invite, just let me know. I will invite you to become a member of Pinterest.
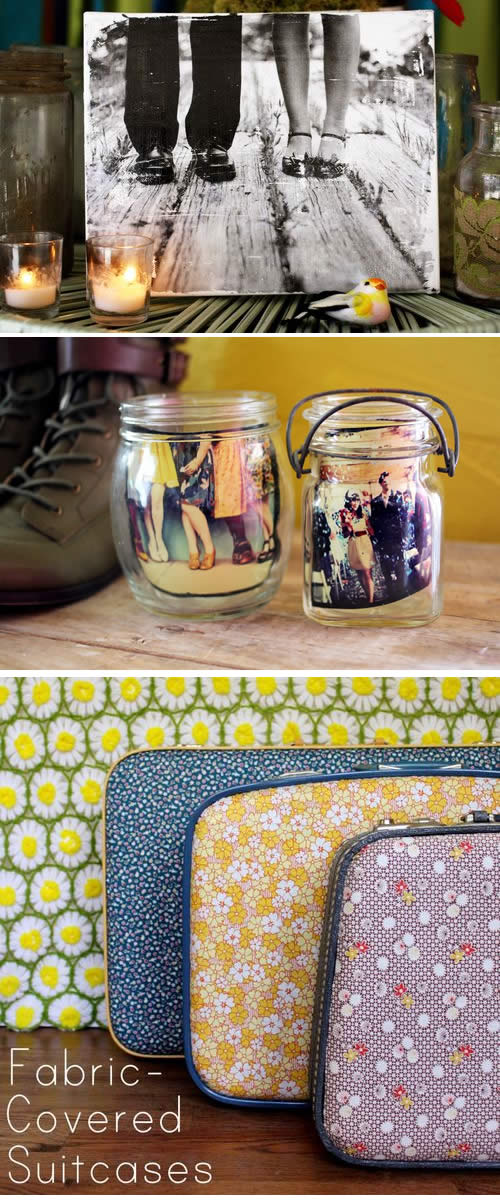
Here are a few DIY things that you can find from A Beautiful Mess Blog -
Canvas Transfer // 5 ways I display photos in my house // Make your own floral suitcase
Hope you have a nice Thursday,
Ira
Showing posts with label tutorial. Show all posts
Showing posts with label tutorial. Show all posts
Thursday, January 12, 2012
Wednesday, September 21, 2011
Fun Tutorial Wednesday
This week's tutorial we will be exploring from other bloggers. Here are few tutorial that I found pretty fun. Check out their blog as well, they will inspire you a lot.
Fabric Design Tutorial:
Fabric Storage Box from Make it Love it Blog
Back to School Tutorial:
Back to School Tutorial ~ Pretty paper covered book from Aesthetic Nest
Ira.
Fabric Design Tutorial:
Fabric Storage Box from Make it Love it Blog
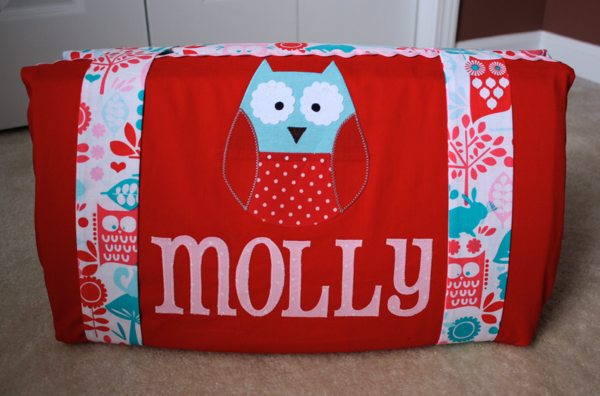
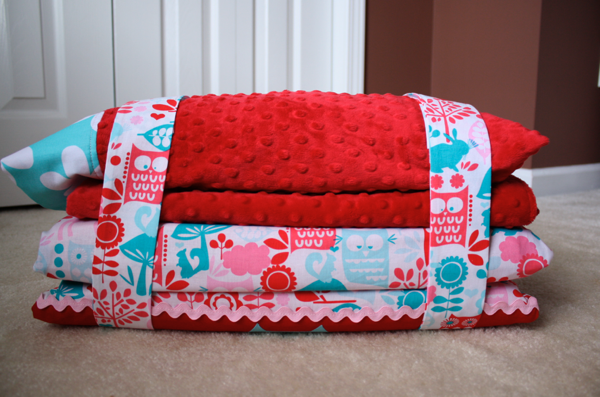
Nap Mat Tutorial - Very clever by Sew like my mom
Back to School Tutorial:
Back to School Tutorial ~ Pretty paper covered book from Aesthetic Nest
Decorating Tutorial:
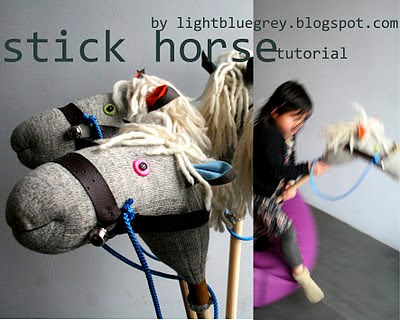
Accessories Tutorial
Hope you're enjoying these tutorial!...
Live, love and be Creative,
Wednesday, September 14, 2011
Thread Bangle How-To
I have few bangles that is made out of glass, and they are easily breakable. I thought it's time to do a jewelry makeover. Let's learn how to make thread bangles.
All you need for the materials are:
Individuals bangles or the thick plastic bangle (you can put them together)
Embroidery thread
Ribbon.
First, you just need to create a loop to your bangles and start covering them with embroidery thread.
At the end of it, make a loop and tie a knot to tighten the strings.
Add a piece of ribbon to cover the area where you tied the knot and make a nice bow knot there as an accent. If you don't wish to do this, you can also glue the end of the thread at the back side of the bangle.
You can share your ideas, photos of what you decide to do with your bangle below.
Live, Love and Be Creative,
Labels:
Bangle,
Magnet Tutorial,
Thread Bangle,
tutorial,
Wednesday Tutorial
Wednesday, August 24, 2011
Travel Themed Book Binding Tutorial
Material you will need (all of book binding material I bought from Paper Source):
Book Cloth (I choose Oyster color)
Text Block Kit (already included book board and text block book, I chose Graph for drawing)
PVA glue
Decorative paper
Bone Folder
Craft Knife
Here's my final product:
Material details:
Text Block Kit // Decorative paper // Book Cloth
I really have a great time making this. You can also make photo albums yourself. Paper Source has sets of Photo journal block kits as well as Hollanders Book Binding company.
Want to see more tutorial? Join us every wednesday for a fun tutorial project.
Live, Love, and Be Creative,
Ira.
Wednesday, August 17, 2011
Bottle Cap Magnet Tutorial
Lately I have been into bottle cap recycling. I can't wait to show you this fun tutorial that I did with these caps. I took caps from pretty much any jars, Gerber jars, Starbucks Fraps bottle, anything with metal lids on them.
Metal Cap (Lid) from any glass jar food or bottles
Mod Podge
Any artwork or photo
Glossy Accent
Magnet
Glue Gun
Brush
Cardboard paper.
First what you need is to clean the bottle cap and dry them really well. Draw a circle on a cardboard paper material using the back of the cap as measure point.
Once it is dried out, paste the magnet using glue gun and you have your customized/personalized magnet ready!...
Here are few other examples I did that is different that these ones. This is a project I did for Raining Umbrella's last assignment of gift exchange. I gave them to fellow student Sylvia Latham. Just got her message today that she received them!.. I'm loving her respond! :)
"Got the gift and wanted to say THANKS so Much!!!! I love them and use them in my classroom. They also happen to be some of my Favorite verses. Thanks so much! I will have to post pics of them at work in my classroom! Have a wonderful week!" -Sylvia Latham
Ira.
Here are the materials you need:
Mod Podge
Any artwork or photo
Glossy Accent
Magnet
Glue Gun
Brush
Cardboard paper.
First what you need is to clean the bottle cap and dry them really well. Draw a circle on a cardboard paper material using the back of the cap as measure point.
Cut your artwork in the same diagonal as the cardbox, and then paste them together with mod podge.
Once the mod podge is dry, use a glossy accent. I use the glossy accent for scrap booking. Slowly fill the edges and move your way around towards one direction to avoid bubbles. Leave it dry overnight. It will look a little matte at first.
Here are few other examples I did that is different that these ones. This is a project I did for Raining Umbrella's last assignment of gift exchange. I gave them to fellow student Sylvia Latham. Just got her message today that she received them!.. I'm loving her respond! :)
"Got the gift and wanted to say THANKS so Much!!!! I love them and use them in my classroom. They also happen to be some of my Favorite verses. Thanks so much! I will have to post pics of them at work in my classroom! Have a wonderful week!" -Sylvia Latham
If you like these magnets, you can download the templates here.
Hope you like this tutorial.
Live, Love, and Be Creative.
Thursday, August 11, 2011
Image Transfer Tutorial.
This week has been a hectic week for me. I was hoping to post tutorial this week about recycling items just like our theme this week, however, I changed my mind and decided to show you other resources that shows how to do image transfers.
Image transfer: From Paper to Fabric tutorial from Ticking and Tole Bird in Nest Image Transfer
You will enjoy this tutorial from Shellagh.
Ira.
Image transfer: From Paper to Fabric tutorial from Ticking and Tole Bird in Nest Image Transfer
You will enjoy this tutorial from Shellagh.
Another fun resource: Michelle Palmer Image Transfer Tutorial using packing tape.
This is another image transfer project by PhotoJojo Inkjet Image Transfer Tutorial
Hope you will find these tutorial resources helpful for your craft projects.
Live, Love and Be Creative.
Wednesday, August 3, 2011
Recycling Baby food Jars into Hair Accessories Storage
I have so many baby food jars from Gerber. They are the 4 oz ones. I love the idea of keeping them, because I know that one day I might need them for something, but since I have no place to put them, so I have been storing them in an Amazon box. And I have not been doing anything to make them useful. This week's project has been trying to make use of Gerber jars into something artsy and creative.
Here's project one: Making them into Lucy's hair accessories storage. Lucy has so many hair accessories, and it's nice if her momma organize it a bit for her.
Here's the tutorial.
Materials I use:
1. Glue Gun
2. Fiskar round and square template
3. Fiskar cutter
4. Cutting Board
5. Label Maker
6. Baby food Jars
7. 1/4" Satin Ribbon.
First, I have 5 of the baby food jars. They just had them labeled with the label maker. My attempt is to make these jars look more decorative.
First I made several cuts using my fiskar cutter and template to make two sizes of circle shape and 1 size of rectangular shape for labeling.
You see how the side area still show the manufacturer's brand? We're going to glue the ribbon on them to cover it.
All right, now the top lid is ready. Let's work on the side area of the jar. Remember those rectangular shapes that we cut last time, we're going to use them for labeling on the side area. Here's how its look like with the side label.
Now, we're going to use our label maker to print our labels. If you don't have a label maker, you can just write your labeling, make it more personal. I use Dymo Label Maker. It's small, portable and only requires 4 AA batteries. It can save multiple words in your folder and have different font and size format, complete with borders and font styling (i.e. underline, outline, etc)
Once you printed all your labels, you can now paste them into your jars. I put the label in two positions, one on top of the lid, and the other one on the side label (rectangular shape).
And here's how it looks on the side labeling.
Here's project one: Making them into Lucy's hair accessories storage. Lucy has so many hair accessories, and it's nice if her momma organize it a bit for her.
Here's the tutorial.
Materials I use:
1. Glue Gun
2. Fiskar round and square template
3. Fiskar cutter
4. Cutting Board
5. Label Maker
6. Baby food Jars
7. 1/4" Satin Ribbon.
First, I have 5 of the baby food jars. They just had them labeled with the label maker. My attempt is to make these jars look more decorative.
First I made several cuts using my fiskar cutter and template to make two sizes of circle shape and 1 size of rectangular shape for labeling.
After cutting them in those shapes, start gluing them on the top side of the jar's lid. Here's how it looks after you glue them.
Once you printed all your labels, you can now paste them into your jars. I put the label in two positions, one on top of the lid, and the other one on the side label (rectangular shape).
And here's how it looks on the side labeling.
That's it for today, tune in next week for more tutorial. Have a wonderful day!
Live, Love and Be Creative,
Ira.
Ira.
Thursday, July 21, 2011
DIY Flower Fabric hair clip.
I received a lot of positive feedback from my flower fabric inspiration board last week. So, today I'm going to show you a DIY tutorial of the flower fabric that I did this week, the tutorial involves no sewing at all.
Please bear with me, as this is going to be my first tutorial post. If you have any questions, just shoot your question in the comments below. Also if you have made anything using this tutorial, please share your photos in the Flikcr group.
Flower Fabric no sew tutorial
Materials:
1. Any kind of fabric scrap.
2. Glue gun to paste the fabric.
3. Felt material fabric to paste the fabric in.
4. Headbands or hair clip.
First you will need to cut a long strip of the fabric and a square felt fabric. Take the end of the fabric to make a knot. Dab a little glue (glue gun) on a square felt fabric, and paste the knot in the middle of it.
Ira.
Please bear with me, as this is going to be my first tutorial post. If you have any questions, just shoot your question in the comments below. Also if you have made anything using this tutorial, please share your photos in the Flikcr group.
Flower Fabric no sew tutorial
Materials:
1. Any kind of fabric scrap.
2. Glue gun to paste the fabric.
3. Felt material fabric to paste the fabric in.
4. Headbands or hair clip.
After that, you want to twirl the fabric around that knot, and simply dab little bit of glue as you keep moving. Keep going until the end of the fabric, and tuck the last part in using the glue to paste it to the felt.
I made three of these, and after that,cut the felt fabric around it and put together the three flowers with glue on each side to paste them together.
Take another felt material at the bottom of these flowers, pin the side of it to keep it intact, and cut the felt material to follow the shape of the three flowers.See below result.
You can use headband or hair clip to glue this on. I use a headband. So, I glue the headband on it and paste the bottom felt to cover the headband on it.
Here's the end result.
I made varieties of these flowers:
I hope this helps. Thanks to Pink Suede Shoe for giving me the inspiration.
Live, Love and be Creative,
Monday, July 18, 2011
Joy = Create
RAINING UMBRELLA EXERCISE
Have your ever feel so joyful after you create something for yourself or others?... I do, I feel like I accomplish a lot and feel so joyful after creating them.
Last week at the church, my friend, Sandy requested me if I would create a fanny pack for her before she goes to school for two-months in Europe. So, I have been thinking and conceptualizing the idea in my head. So early last week, I started to sketch of the purse that I wanted to make.
Making this purse is my first project, and I really enjoyed making them, even though it took longer than I thought I would be. I learned that I need to do a lot of preparation when it comes to creating a purse/fanny pack - it's not like you just take it to your sewing machine.
All right, it's time to share some photos.
I had to make these sketches first, just to make sure that I laid it all right.
I took this tutorial from A Sewcial Life Blog as the clutch's base work. Some tutorials that I saw were also from this website.
I had the tutorial to make the inside pocket zipper - from U hand-bag blog. The rest I just winged it by imaginations and few sketches.
Here's the final piece of my first fanny pack. I'm sorry I didn't get a chance to take photos of the process- but I promise, next time I will do that.
Live, Love, and be Creative,
Ira.
Subscribe to:
Posts (Atom)


